How to Prepare Your Bathroom Floor for a Glass Shower Partition
Planning to install a glass shower partition in your bathroom? Before choosing the glass, hardware and design, it is important to get the bathroom floor levels, drainage and waterproofing right.
A well-planned bathroom separates the shower’s wet area from the rest of the bathroom, helping keep the toilet, washbasin and surrounding floor drier and more comfortable to use.
At Crystal Contracts, we recommend considering three important factors before bathroom tiling begins: a sunken shower area, separate drainage for wet and dry areas wherever practical, and proper floor slopes towards the drains.
1. Why Should You Plan the Floor Before Installing a Glass Partition?
A glass shower partition helps contain splashing water, but it cannot completely prevent water from reaching the rest of the bathroom. Water can escape through the entrance, travel along the floor or spread when the shower door opens.
If the entire bathroom floor is at the same level and the drainage is poorly planned, water may collect around the toilet, washbasin and other areas.
The solution starts before the tiles are laid. By planning the shower floor level, drainage and slope in advance, you can create a bathroom that is easier to maintain and more comfortable to use.
2. Create a Sunken Shower Area
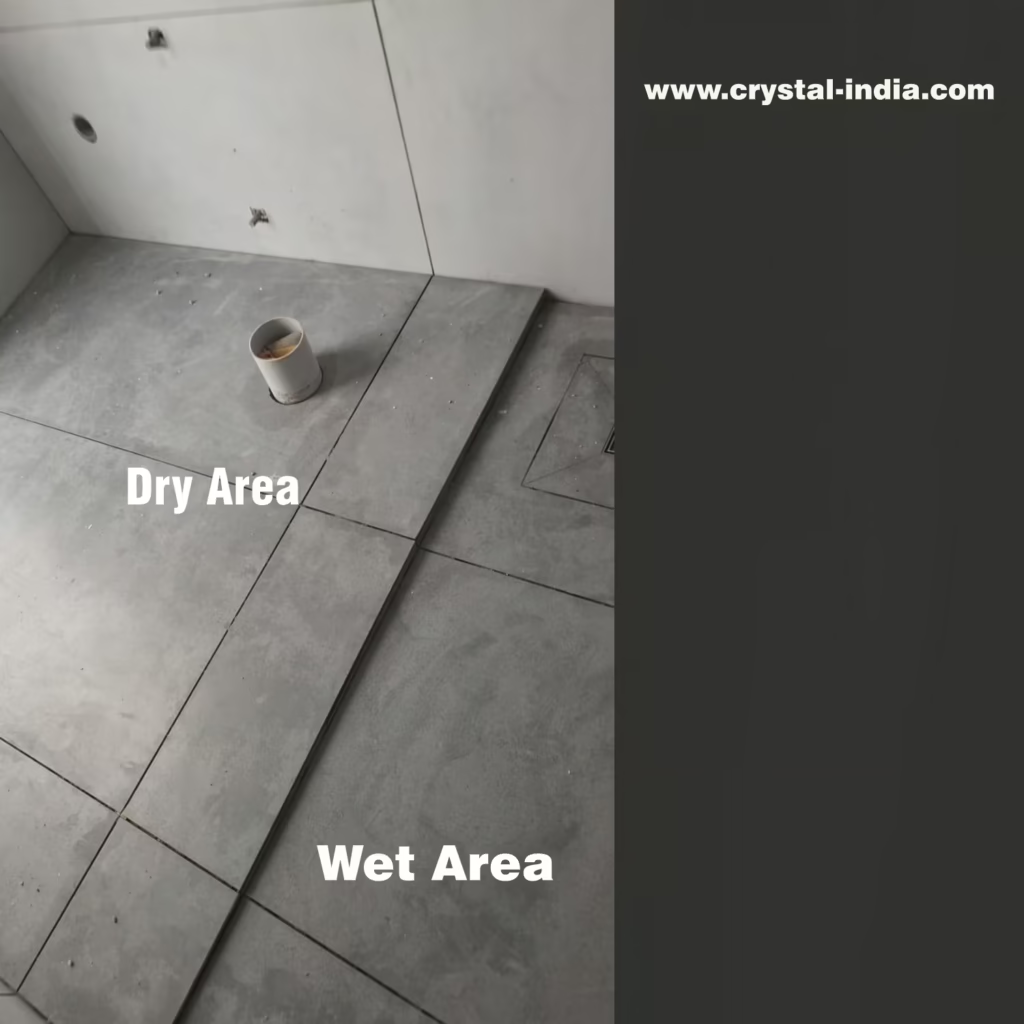
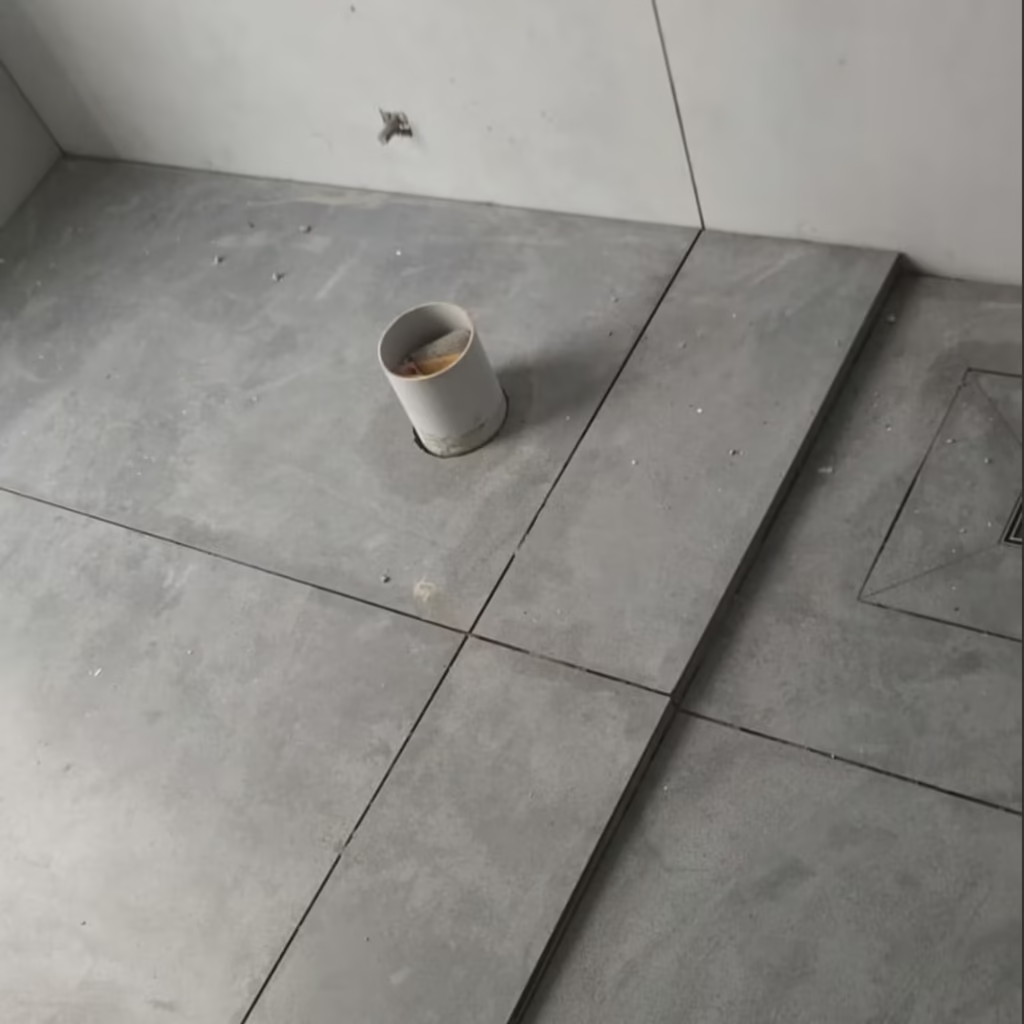
One of our recommended approaches is to make the shower area slightly lower than the surrounding bathroom floor.
This creates a natural level difference between the wet and dry areas. If water escapes the glass enclosure, the lower shower area can help contain it, provided the floor slopes and drainage are correctly designed.
A sunken shower area is particularly worth considering when constructing a new bathroom or renovating one where the floor structure can be modified.
Important: The recessed floor must be properly waterproofed, and the finished shower floor must slope towards the drain. A lower floor alone will not prevent water leakage or pooling.
3. What Is the Recommended Difference in Floor Level?
As a practical planning recommendation, we suggest discussing a finished floor-level difference of approximately 50 mm (2 inches) between the shower area and the surrounding bathroom floor.
A proposed range to consider is:
- 25 mm (1 inch): A smaller level difference where site conditions or access requirements limit the available depth.
- 50 mm (2 inches): Our preferred starting point for discussion during bathroom planning.
- 75 mm (3 inches): A deeper level difference that may be suitable in some bathrooms, subject to the design and available floor depth.
These are practical recommendations, not universal building-code requirements. The appropriate depth depends on the floor construction, drainage arrangement, waterproofing system, accessibility requirements and finished tile levels. Confirm the final design with the architect or qualified contractor before construction.
4. Why Are Two Separate Drains Recommended?
Where practical, we recommend providing two separate drainage points:
Drain 1: Shower or wet area
This drain collects water from showering. The floor should slope towards it so that water does not remain standing on the tiles.
Drain 2: Dry area
A separate floor drain helps manage water from floor cleaning, accidental splashes and other routine bathroom use.
Separate drains allow the wet and dry areas to be planned more independently. However, the drains must be correctly sized, connected and trapped, and the floor slopes must direct water towards the appropriate outlets.
The dry area should also be designed to avoid unnecessary water accumulation around the toilet and washbasin.
5. What If Two Separate Drains Are Not Possible?
In some bathrooms, plumbing positions, limited space or renovation constraints may make two drainage points difficult to provide.
Even in such cases, we strongly recommend considering a difference in floor level between the shower and the surrounding bathroom floor wherever feasible.
The shower area should have a suitable slope towards its drain, and the transition at the glass partition should be designed to limit water spreading into the rest of the bathroom.
Where a level-access shower is required, an appropriately designed linear drain, carefully formed floor slopes and a compatible waterproofing system may provide an alternative.
The important principle is to plan how water will be contained and drained before the tiles and glass partition are installed.
6. Don’t Overlook Waterproofing and Floor Slope
Good drainage is only one part of a reliable bathroom floor. Waterproofing beneath the tiles is equally important.
Before tiling, ensure that:
- The shower floor has a continuous slope towards the drain.
- The waterproofing system is suitable for the shower floor and exposed walls.
- Floor-to-wall joints and drain connections are properly waterproofed.
- The drainage outlets can handle the expected water flow.
- The completed floor does not have low spots where water remains standing.
- The waterproofing is tested according to the system manufacturer’s instructions before the tiles are laid.
Tiles and grout alone should not be treated as the waterproofing system.
7. Bathroom Planning Checklist Before Tiling
Before your contractor begins tiling, check the following:
- Has the shower area been identified as the wet zone?
- Can the shower floor be recessed below the surrounding bathroom floor?
- Has the proposed floor-level difference been agreed upon?
- Can separate drains be provided for the wet and dry areas?
- If only one drain is possible, has the drainage and floor-level design been reviewed carefully?
- Does the shower floor slope towards the drain?
- Has the waterproofing system been specified and tested?
- Has the location and type of glass shower partition been finalised?
Discussing these points before tiling can help avoid expensive alterations later.
Plan Your Bathroom Right Before Installing Your Glass Partition
A well-designed glass shower partition begins with a well-prepared bathroom floor. The right combination of floor levels, drainage, slope and waterproofing helps create a bathroom that looks better and is easier to maintain.
If you are planning a new shower enclosure, consult your architect or interior contractor about these details before the tiling work begins.
Crystal Contracts recommends planning the bathroom floor and drainage before finalising the glass shower partition, so that both the appearance and functionality of your bathroom are considered from the start.